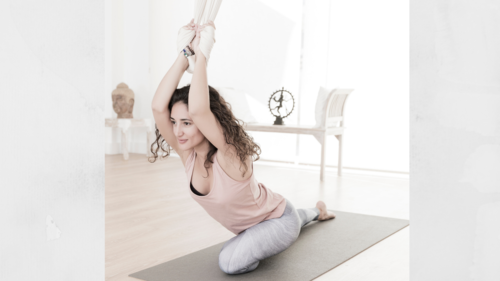
Aerial Yoga is the adaptation of traditional Hatha Yoga to a combination of acrobatics involving a hanging hammock of material. While some may assume that this is designed for experienced Yoga Practitioners, it is far from the truth and is suitable for all levels, from beginners to experienced. It can be gentle and restorative or physically demanding. You can start right at the beginning with these gentle and beginner poses. We will take you through step by step to commence an Aerial Yoga Journey at home.
What do you need to do Aerial Yoga at Home?
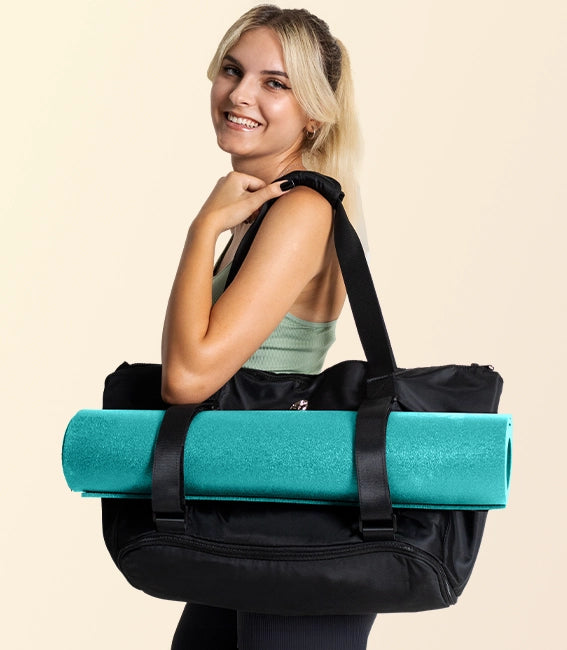
Not a lot is needed to start Aerial Yoga at home. First, make sure you have a quality yoga mat and a mat bag to carry and store your gear easily—especially if you’re moving between spaces. You’ll also need sufficient space: your ceiling should be at least 2.7 metres high with 1.5 metres of clearance before and behind the mat.
Along with that, you need hammock silk, skin-tight clothing, a yoga mat, and the equipment for your mount.
If your house has wooden ceiling studs at least 5 inches in thickness. You will need two mounting brackets with four holes and M6 or 5-inch-wide wood screws, 60mm to 2.5 inches long.
For a concrete ceiling mount, buy a specifically designed mounting set from a reputable retailer. This will include two mounts and four nuts and bolts designed exclusively for this purpose. You will need a 5 inch Masonry Drill up to 2.75 inches long, and your Mounting set.
Only mount to your ceiling if you know it is safe. If you are in doubt, hire a professional to mount it for you.
If you have the room, a certified purpose-built frame is also an excellent idea.
1 & 2. Cat and Cow Pose


Cat and Cow pose will improve the spine’s flexibility while removing tension from the neck and shoulders, lower and middle back. It engages the core muscles, which massages the digestive system improving digesting and strengthening the core. This is a beautiful pose for reducing stress and insomnia. Using the sling is a gentle way to reduce stress on your wrists and shoulders if you are injured or weakened in this area.
- Kneel behind the sling.
- Wrap the wrists, holding onto the sling.
- Glide your wrists down the sling and bring both wrists close to each other, almost touching.
- Get into the tabletop, with knees hip-width apart and tops of feet to the mat. The back should be straight.
- (Cat) Breath In – Drop belly, gaze forward, tail bone up
- (Cow) Exhale – round/arch upper back, draw the navel in, tuck tailbone.
3. Downward-Facing Thunderbolt Pose

Downward facing Thunderbolt is an excellent pose for releasing tension in the shoulders and engaging the core without putting tension into the neck. Engaging the core builds strength which assists in improving posture and minimising tension headaches.
- Kneel in front of the sling.
- Wrap wrists and hold onto the sling.
- Inhale, then as you exhale, let your chest drop slowly towards the mat.
- Inhale, lift glutes from your heels.
- Exhale, push the Hammock out slowly in front of you and press forward.
- Engage your abdominal muscles. Two breaths.
- Pull back and place your glutes back on your heels.
4. Downward Facing Dog Aerial

Using a hammock in Downward facing dog has the added benefits of support on the pubic bone, allowing the hips to lift higher. This will deepen your stretch and maximise the lengthening of the spine. Using the Hammock allows you to keep your body lighter and feel confident in the stretch without placing stress on your wrists. Assists with back pain, sciatica and anxiety.
- Stand behind your sling and hold it with your hands.
- Pull the sling into your pubic bone at the hip. Spread it hip-distance apart.
- Exhale, bend forward, holding the Hammock and once it is secure, bring your hands to rest on the floor.
- Press the fingers and the palms into the floor.
- Raise your hips up and set your feet to the floor firmly.
- Stretch and lengthen the neck, shoulders, and legs.
- Keep your feet and hands connected to the earth, and do not “fall” onto the sling.
5. Revolved Downward Facing Dog

When you revolve the downward Dog in this position, it stimulates the liver and kidneys while stretching the shoulders, hips and neck. Improves digestion by massaging the internal organs and elongates the stretch in the spine without excessive pressure on a single wrist.
- From downward Dog, bend the knees if needed.
- Ensure hands are shoulder-width apart.
- Inhale, then exhale and lift the left and reach it to the right ankle.
- Inhale, exhale, then return to the centre.
- Inhale, exhale, then lift the right hand and reach back to the left ankle.
- Return to the centre.
6. Wide-Legged Forward Bend Pose

This pose assists with low blood pressure. You will strengthen your neck muscles and encourage blood to flow to the brain. This pose will assist with anxiety and promote deep sleep.
- Stand in front of the sling.
- Pull the sling towards your hip crease.
- As you exhale, bend into tabletop position, releasing the hands from the sling.
- Inhale, and as you exhale, reach hands to the ankles, lengthen your back and bend the knees if needed.
7. Revolved Wide-legged Forward Bend Pose

Twisting this pose benefits the digestive system, liver, and kidneys by massaging your internal organs. The extended strength in the upper back, shoulders and neck reduces tension and minimises headaches from bad posture.
- From the wide-leg bend come up to tabletop
- Inhale and twist to the left side.
- Raise your left hand toward the ceiling and look at your left fingers.
- Hold for two breaths, then change sides. Do this twice for each side.
8. Bridge Pose Aerial

Aerial Bridge pose will strengthen your chest, neck, spine and hips. Your circulation will improve, and it may assist you with stress and mild depression.
- From your back, place one ankle, then the other into the sling.
- Press arms and palms into the mat.
- Exhale and draw in your tummy.
- Inhale and lift your hips up, imagining a straight pole from your chest to your feet.
- Press your shoulder blades into the mat, keep pressure off your neck.
- Lift and release four times.
9. Seated Forward Bend Pose

Seated forward bend pose in aerial will benefit your middle back with a long stretch that reduces tension, your hamstrings by allowing you to deepen the stretch without forcing it and your core as you engage it to create strength and balance in your pose.
- From a seated position, straighten your back, place the balls of both feet in the sling.
- Rest into your seat bones and keep your back straight.
- Inhale, exhale and reach your hand forwards towards your ankles.
- If you need to allow a bend in the knee to keep a stretch in the hamstring but still allow you to keep a straight back.
- Hold for four breaths, lengthening the spine and gently reaching further into the stretch with each exhale. If you are already flexible, gaze at your knees and draw your face to the knees, ensuring a straight back and engaging your core.
- To release – let go of ankles and come back to sitting, then remove the feet from the sling.
10. Revolved Reclined Big Toe Pose One Leg Aerial

Keeping one leg down and raising the other stimulates the pelvic floor and reproductive system, strengthening both. Contracting of muscles in the pelvic region improves the strength and performance of the rectum and urinary tract by strengthening muscles and encouraging fresh blood flow.
- Shavasana, or corpse pose, lift your left leg and place it in the sling at the ankle.
- Exhale, inhale and lift the right leg reaching for the big toe with both hands.
- Keeping your shoulder blades pressed into the earth, and bending the knee if needed, hold and draw in the belly.
- Release and place the right leg in the sling with the left. Then repeat the steps with the left leg.
Aerial Yoga is a fun, new and gentle way to practice and complement an already established Yoga practice or begin to learn about Yoga.
The sling assists in making poses with low impact while allowing, in some cases, a deep and meaningful stretch without causing stress to high impact joints like shoulders, wrists and ankles. Mastering the above poses will improve your balance and confidence, allowing you to progress to the inverted and more challenging poses.


