Led by Somiya, a UAE-based certified yoga teacher, meditation guide, and healing practitioner, this session creates a calm and supportive space to help you release stored tension, reconnect with your body, and feel more at ease in both mind and posture
Somiya Mehta - Certified Yoga Teacher
Part 1: 9 Chair Yoga Poses for Office Workers to Relieve Neck Tension
If you spend long hours at a desk, in meetings, on calls, or working from home, chances are your neck has something to say about it.
That tight feeling at the base of the skull. The stiffness when you turn your head. The dull ache creeping into your shoulders by mid-afternoon. Neck tension has become one of the most common discomforts in modern working life.
The good news? Relief doesn’t always require a full workout, a massage appointment, or leaving your desk.
This gentle chair yoga for neck pain sequence is designed specifically for office workers, professionals, and remote workers who need a practical way to reset during the day.
What You’ll Get in This Sequence
Before we begin, here’s a quick look at the gentle poses and techniques included in this chair yoga practice:
These movements are designed to release tension in the jaw, neck, shoulders, and spine—the areas most affected by desk work and long hours of sitting.
1. Jaw Release
2. Shoulder Shrugs
3. Chair Cat Cow
4. Weighted Lateral Neck Release
5. Suboccipital Pinch and Release
6. Chin Tuck & Skull Cradle
7. Chair Standing Forward Fold
8. Standing Ear-to-Shoulder with Arm Reach
9. Standing Chair Twist
Watch full chair yoga flow for neck tension relief here:
Watch the full sequence here. Guided by Somiya—a UAE-based certified yoga teacher, meditation guide, and healing practitioner—this chair yoga session is designed for office workers to gently release neck tension, reset posture, and reconnect with the body through calm, supportive movement. Proudly sponsored by Warrior2 Yoga.
Why Neck Pain Happens at Work
Many people think neck pain comes only from “bad posture,” but it’s often more complex than that.
Neck discomfort can build from:
Looking down at laptops or phones
Holding stress in the jaw and shoulders
Sitting still for long periods
Shallow breathing during stressful tasks
Mental tension from deadlines and multitasking
Poor ergonomic desk setup
Working from couches, beds, or makeshift home offices
The neck often becomes the meeting point between physical strain and emotional stress.
That’s why this sequence doesn’t just stretch the neck—it addresses the jaw, shoulders, spine, breath, and nervous system too.
What Will You Need for This Practice - And Is Your Chair Ready?
A chair without armrests is ideal for this sequence, as it allows you to move more freely and comfortably through each posture. If possible, choose a stable chair with a flat seat and good support so you can stay grounded throughout the practice. Check how to choose a chair for chair yoga here.
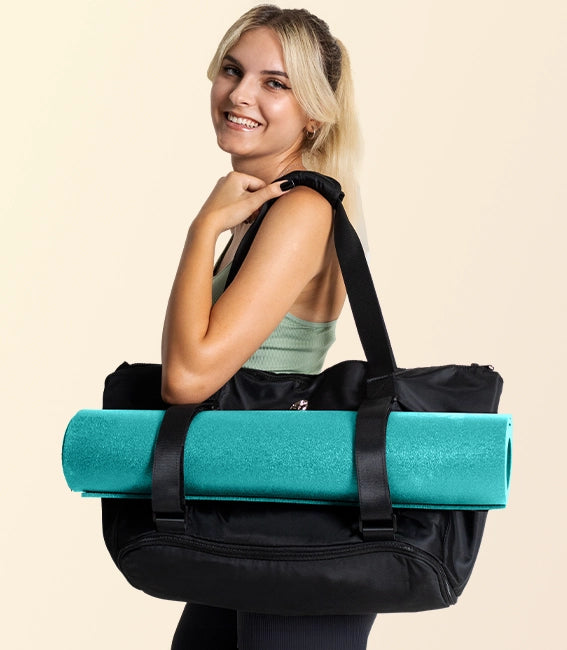
Depending on your space, you may also find a yoga mat helpful for added comfort and stability, especially if you choose to extend the practice beyond seated movement. And if you’re moving between work and studio sessions, a well-designed yoga tote bag can make things easier - carrying your mat, laptop, and essentials in one place, with thoughtful features like a built-in mat strap and travel-friendly luggage sleeve.
1. Jaw Release
1. Jaw Release
Before touching the neck, begin with the jaw.
Open the mouth wide and hold for three seconds. Then slowly close it. Let the teeth separate and allow the jaw to hang softly.
Repeat for three rounds.
This may seem simple, but the jaw and neck often store tension together. When the jaw softens, the muscles around the base of the skull often begin to release too.
Desk tip: Try this before a stressful call or after concentrating intensely.
2. Shoulder Shrugs to Let Go
2. Shoulder Shrugs
Take an inhale and lift both shoulders all the way toward the ears.
Then exhale and let them drop naturally—without controlling the descent.
Repeat for three rounds.
This movement helps release the upper trapezius muscles, which commonly tighten during computer work.
Notice the feeling around the neck and skull as the shoulders drop.
3. Chair Cat-Cow for the Whole Spine
3. Chair Cat Cow
Place hands on your knees.
As you inhale:
Arch the back
Lift the chest
Let the chin rise gently
Gaze upward
Repeat for three rounds.
The neck is not meant to move in isolation. It moves best when supported by the whole spine. This flowing movement helps restore mobility through the back, shoulders, and neck together.
4. Weighted Lateral Neck Release
4. Weighted Lateral Neck Release
Tilt your head gently toward the right shoulder.
Place your right palm softly on the left temple—not to pull, only to rest the weight of the hand.
Take three slow breaths into the left side of the neck.
Return to center and switch sides.
This gentle weighted release is often more effective than aggressive stretching.
Remember: More force does not mean more relief.
5. Suboccipital Pinch and Release
5. Suboccipital Pinch and Release
Bring both hands behind the neck.
Using thumb and index finger, gently pinch the muscles beside the spine—not the spine itself.
Move slowly downward from the skull base. When you find a tender or tight spot, pause for two to three seconds.
Then use fingertips to make small circles around the bony ridge at the base of the skull.
This area holds enormous tension for desk workers and people under stress.
6. Chin Tuck with Skull Cradle
6. Chin Tuck & Skull Cradle
Sit tall.
Draw the chin straight back—not downward—as if making a double chin.
Hold for three seconds, then release.
Repeat three times.
On the final round, keep the chin tucked and place hands behind the skull with fingers interlaced. Let the weight of the hands create gentle traction as you breathe for three slow breaths.
.This movement strengthens better alignment and counters forward-head posture from screens.
7. Standing Chair Forward Fold
7. Chair Standing Forward Fold
Stand behind your chair and place hands on the chair back.
Walk your feet back until your spine becomes long and parallel to the floor.
Let the head hang fully between the arms.
Stay for three breaths.
Your neck carries the weight of your head all day long. In this moment, it gets to rest.
This can feel deeply relieving after hours of sitting.
8. Standing Ear-to-Shoulder with Arm Reach
8. Standing Ear-to-Shoulder with Arm Reach
Hold the chair with your right hand.
Drop the right ear toward the right shoulder.
Reach the left arm downward strongly, fingers spread.
Stay for three breaths, then switch sides.
The reaching arm creates the stretch naturally, without forcing the neck.
9. Standing Chair Twist
9. Standing Chair Twist
Place both hands on the chair.
Feet hip-width apart.
Inhale to lengthen the spine.
Exhale and rotate the torso to the right. Let the right hand slide back while the left hand stays forward. The head turns last.
Stay for three breaths.
Return to center and repeat on the other side.
Feel the twist through the whole spine—not just the neck.
Why This Sequence Works So Well for Office Workers
Many desk stretches only target one muscle group. This sequence works differently.
It combines:
Neck mobility
Shoulder release
Jaw relaxation
Postural correction
Spinal movement
Breath awareness
Nervous system calming
That combination is why people often feel relief quickly.
Somiya’s work centers around creating intentional spaces where you can slow down, reconnect, and feel supported in body and mind.
That means this isn’t about pushing harder or fixing yourself.
It’s about listening to what your body has been carrying—and giving it a moment of care.
Final Thoughts
Neck tension is common, but it doesn’t have to become your normal.
With a chair, a few mindful breaths, and gentle movement, you can create real relief right where you work.
If your neck feels tired, heavy, stiff, or overworked today, this sequence is a beautiful place to begin.
Your body has been holding a lot.
Let it soften.
Part 2: 10 Chair Yoga Poses for Office Workers to Release Shoulder Tension
If you’ve already completed the first part of this chair yoga sequence, this continuation focuses deeply on the shoulders, upper back, and chest—areas that often hold tension from long hours at a desk.
Led by the same instructor, Somiya, this short sequence is designed to help office workers reset posture, release tightness, and improve upper body mobility in just a few minutes after work or during a lunch break.
📍 Quick Navigation for Chair Yoga Poses in this Section
Watch the full chair yoga sequence for shoulder pain here:
You can watch the full sequence here. The session was guided by Somiya, a UAE-based certified yoga teacher, meditation guide, and healing practitioner - this session offers a calm, supportive space to release tension, reconnect with your body, and move with greater ease in both mind and posture. The session was proudly sponsored by Warrior2 Yoga.
Chair yoga for shoulder pain relief - by Warrior2 Yoga
1. Seated Shoulder Awareness
Sit tall in your chair and gently close your eyes.
Before we move, simply observe your shoulders.
Notice:
Are they lifted toward your ears?
Are they rolled forward?
Is one higher than the other?
Don't try to fix anything yet. Just feel.
Stay here for three slow breaths, allowing awareness to settle into the body.
2. Pendulum Shoulder Rolls
Begin with large, slow shoulder circles.
Roll both shoulders forward for four circles
Then roll backward for four circles
Next, alternate:
Right shoulder forward while left goes back
Feel how the shoulder blades glide across the ribs.
This movement helps reverse the stiffness created by long periods of sitting and typing. We are gently unfreezing the upper back and shoulder system.
3. Cactus Pulses
Bring your arms out to the sides, elbows bent at 90 degrees (like a cactus shape).
Inhale: press elbows back, squeeze shoulder blades together
Hold for 2 counts
Exhale: draw elbows slightly toward each other in front
Repeat slowly.
This is not just a stretch—it also builds strength in the back of the shoulders, improving posture support.
4. Cross Body with Contract and Release
Bring your right arm across your chest.
Use your left hand to gently hold just below the elbow.
Inhale: gently press the arm forward into your hand
Exhale: relax and allow the arm to draw deeper across the body
Repeat for four cycles, then switch sides.
This technique uses the body's natural reflex response to create a deeper release than passive stretching alone.
5. Cow Face Arms
Right arm reaches up, bends at the elbow, and drops behind the back.
Left arm reaches behind the lower back and works upward to clasp, if possible.
If the hands don't meet, use a strap or even your shirt.
Breathe into the tightness in the front of the shoulder.
Stay for four breaths, then switch sides.
One side will feel tighter—this is completely normal. Give it space without judgment.
6. Chest Expansion and Forward Hinge
Interlace your fingers behind your back.
Inhale: straighten the arms and draw shoulder blades together
Exhale: hinge forward from the hips, letting the arms rise slightly
Feel a full opening through the chest and front of shoulders.
Hold for four breaths, then rise slowly, releasing the hands last.
7. Warrior One at the Chair
Stand beside your chair.
Inner hand lightly rests on the chair back
Step the outer foot back
Raise the inner arm overhead
Keep shoulder blades soft—drawn down away from the ears.
Feel the full line from back heel to fingertips.
Hold for four breaths, then switch sides.
This is where shoulder mobility integrates into full-body strength and alignment.
8. Standing Chest Opener at the Chair
Face your chair and place both hands on the backrest.
Walk your feet slightly back.
Now gently:
Drop right shoulder toward the floor, then lift
Drop left shoulder, then lift
Alternate four times each side.
Keep hips square and stable.
This helps open each side of the chest independently while maintaining balance.
9. Standing Thread the Needle
From the side of the chair:
One hand stays on the chair for support
The other arm reaches forward, then threads under the body
Rotate from the upper back, not the lower back
Hold for three breaths, then unwind and switch sides.
This movement improves spinal rotation and releases deep upper back tension from desk posture.
10. Seated Rest Arms Heavy
Close your eyes again.
Let the arms hang naturally by your sides.
Notice:
How the shoulders feel now compared to the beginning
Are they heavier, softer, more open?
Don't analyse—just observe.
Stay here for three breaths, allowing the body to integrate the practice.
Closing Thought
This short chair yoga sequence helps counteract the hidden strain of desk work by restoring:
Shoulder mobility
Chest openness
Upper back strength
Postural awareness
Even a few minutes like this after lunch or at the end of the workday can significantly reduce long-term tension buildup.
Part 3: Chair Yoga for Digestion: Gentle Movements to Support Your Gut at Your Desk
After relieving neck and shoulder tension, we now move into another common challenge for office workers and people working from home: digestion.
Long hours of sitting, rushed meals, stress, and minimal movement can all slow down the digestive system. You might notice bloating, heaviness, or discomfort—especially after eating and going straight back to your desk.
This second part of the chair yoga series, guided by Somiya, shifts the focus inward—supporting your body’s natural digestive process with gentle breath and mindful movement.
Unlike intense workouts, this sequence is designed to work with your body, not against it, especially after meals.

 Somiya